Thursday, December 15, 2011

Measurements

Here is the information of my very handy magnet that I took from my Grandma's house. Hope it helps you!


Cup                Fluid OZ                    TBSP                               TSP                       Milliliters
1 Cup  is equal to 8oz        or           16 Tbsp         or            48 tsp               or          237ml
3/4 Cup      or      6 oz        or           12 Tbsp         or            36 tsp               or          177ml
2/3 Cup      or      5 oz        or           11 Tbsp         or            32tsp                or          158ml
1/2 Cup      or      4 oz        or             8 Tbsp         or            24 tsp               or          118ml
1/3 cup       or      3oz         or             5Tbsp          or            16tsp                or            79ml
1/4 cup      or      2 oz        or             4Tbsp          or            12tsp                or            59ml
1/8 cup      or       1 oz       or              2Tbsp          or              6tsp                or            30ml
1/16 cup    or      .5oz        or              1Tbsp          or              3tsp                or            15ml


 Cutting things in half:

1 cup in half is 1/2cup
3/4 cup in half is 1/4 cup and 2 tablespoons
2/3 cup  in half 1/3 cup
1/2 cup in half is 1/4 cup
1/3 cup in half is 2 1/2 tablespoons
1/4 cup in half is 2 tablespoons

Tablespoons in half:
1 Teaspoon in half is 1/2 teaspoon
1/2 Teaspoon in half is 1/4 teaspoon
1/4 Teaspoon in half is 1/8 teaspoon (measure 1/4 and take out half) like this:

 AFTER
Some from the one side fell into the empty side, but it's still half. Now, If you at anytime said to yourself, " 1/4 plus 1/4 is 1/8" I will officially begin to worry about society.

Better than Starbucks Pumpkin Scones

I swear to these scones. They are better  than Starbucks' (a lot less dry!). I don't remember the original webiste I got this recipe  from, but THANKS!

PUMPKIN SCONES


INGREDIENTS:
2 cups all-purpose flour
7 tablespoons granulated sugar
1 tablespoon baking powder
1/2 teaspoon salt
1/2 teaspoon ground cinnamon
1/2 teaspoon ground nutmeg
1/4 teaspoon ground cloves
1/4 teaspoon ground ginger
1/2 cup canned pumpkin
3 tablespoons half-and-half
1 large egg
6 tablespoons cold butter


Plain Glaze
1 cup plus 1 tablespoons powdered sugar
2 tablespoons whole milk

Spiced Icing
1 cup plus 3 tablespoons powdered sugar
2 tablespoons whole milk
1/4 teaspoon ground cinnamon
1/8 teaspoon ground nutmeg
pinch ground ginger
pinch ground cloves


INSTRUCTIONS
1. Preheat oven to 425 degrees F.
2. Combine flour, sugar, baking powder, salt, 1/2 teaspoon cinnamon, 1/2 teaspoon nutmeg, 1/4 teaspoon cloves, and 1/4 teaspoon ginger in a large bowl.
3. In a separate medium bowl, whisk together pumpkin, half-and-half, and eggs.
4. Cut butter into cubes then add it to the dry ingredients. Use a pastry knife or a fork to combine butter with dry ingredients. Continue mixing until no chunks of butter are visible. You can also use a food processor: Pulse butter into dry ingredients until it is the texture of cornmeal or coarse sand.
5. Fold wet ingredients into dry ingredients, then form the dough into a ball. Pat out dough onto a lightly floured surface and form it into a 1 -inch thick rectangle that is about 9 inches long and 3 inches wide. (side note: I make my scones smaller to  get more out of it.)


Use a large knife or a pizza wheel to slice the dough twice through the width, making three equal portions. Cut those three slices diagonally so that you have 6 triangular slices of dough.

6. Bake for 14 to 16 minutes on a baking sheet that has been lightly oiled or lined with parchment paper. Scones should begin to turn light brown.


7. While scones cool, prepare plain glaze by combining ingredients in a medium bowl with an electric mixer on medium speed. Mx until smooth.
8 When scones are cool, use a brush to paint a coating of the glaze over the top of each scone.


9. As that white glaze firms up, prepare spiced icing by combining ingredients in another medium bowl with an electric mixer on medium speed.


Drizzle this thicker icing over each scone and allow the icing to dry before serving (at least 1 hour). A squirt bottle works great for this, or you can drizzle with a whisk.Makes 6 scones.

You can also use a fork to drizzle it onto the scones. (note I did not make the white glaze- I like to cut out a lot of extra sugar)

Wednesday, December 14, 2011

Buttercream icing

Here is the Wiltons butter cream icing and simple instructions on filling the icing bag (sometimes it's harder than it looks!)

1/2 cup Butter
1/2 cup Crisco
1 teaspoon vanilla
4 cups of powder sugar
2 TABLEspoons milk

Cream butter and crisco together, add 1 cup powder sugar at a time. By the second cup of powder sugar add the Vanilla and milk.
 

Make sure you keep track of how many cups you put in! If you don't add enough it will not be stiff enough to decorate with. It will look kinda runny.


It should look like this:


After you chose the colors of icing you want (using the GEL from Wiltons, not the liquid stuff you get at the grocery store- it will thin it out). Snip the tip of your icing bags (available at Wal*Mart) and place in the small piece of ___________ fold the top of bag over and place your hands under it (this will make sure your bag doesn't get too dirty along with your hands). Scoop the icing in and try to get it as close tot he bottom as you can.

Cupcake cakes

Ever see those cupcake cakes in the grocery store and think, " I gotta learn to make those!" well my friends you have come to the right place. They are great for parties because you don't really need a plate for each kid and you know exactly how many people you will serve with it.


What you'll need:
cupcakes pre made
icing (either butter cream or from a jar)  Find the recipe here: Wilton Buttercream
Smoothing spatula
icing gels from Wilton.

The Cupcake cake (the pull-apart cake)

Start with making your favorite batch of cupcakes.  After they have cooled, you'll need to line them up on either a piece of card board or if you're fancy a cardboard you bought for cakes from Wilton.


First thing I want to point out to you is all the gaps. If you leave it like that even the stiffest buttercream is going to fall through. So alas all the OCDers out there (me included) must deal with it not...being...straight!


See? less gaps. Plus I hear cupcakes love to cuddle.

 Make your buttcream (or icing in a can) and place a big glob in the middle.


 Using your spatula (not the kind you cook with, the cake decorating one) smooth it out, adding more as you go until it's covered.

Now I usually draw on the cakes and this one happens to need to be a big rig truck. So I have my picture of the truck


and using a toothpick I'm going to sketch out the drawing of the truck


 When I'm done drawing, I take my icing bags and with the small circle tips begin outlining in the colors I want.
I added a Teddy graham driver for giggles.

I then smooth the icing with my spatula and continue on the next color until I'm done.

I used large pretzel rods for the logs.

Here are my other cupcake cakes:

Kermit the Frog


Bugs Bunny

Tuesday, December 13, 2011

Two Step Fudge

Fool proof 2 step fudge


Now a funny little story about the fudge. I called my mom this morning and told her I needed the recipe. She can not for the life of her remember I hate certain foods, but this she recited with out missing a beat.

Ingredients:
A  GREASED pan
Sweetened condensed milk
3 cups of chocolate chips (make sure you use a good brand. if you wouldn't eat them plain then don't put it in your fudge!)
Optional:
Candy canes
Walnuts
 Vanilla ( 2 tsps--I've never done it before. In this batch I did use 1/2 tsp)


 You have two options for baking: mix it all together on LOW heat until smooth, or use a double broiler (or a medium sauce pan filled with water and a bowl on top) I used a double broiler.


 gradually mix in the chocolate chips to the sweetened condensed milk. Until smooth and creamy.


 after it's all mixed, it's time to add your extras (this would also be the time to add in the vanilla). I used peppermint because I'm giving them out as treats to teachers.

Mix it well again and pour into a GREASED pan (mine is 9x13 so make more and smaller pieces-


 Smooth it out with either a cake knife or even a pie server :) something with no ridges.


 Now let it set for 20 minutes before pre-cutting it with a pizza cutter. Then an hour after that re-cut it and you have fudge!


Congratulations, that wasn't as hard as people make it out to be ;)

Monday, December 12, 2011

Christmas gifts

Snowmen ornaments:


"These aren't just five snowmen As anyone can see. I made them with my hand Which is a part of me. Now each year when you trim the tree You'll look back and recall When my hand was just this small!"


You'll need:
Plain ornaments
White paint
Sharpies

Paint your childs hand white. Have them spread their fingers and telling them to wait to grip the ornament until you're ready.
After they stamp their hands let them dry for at least an hour and a half. Let them decorate the snowmen with hats and faces using sharpies or various colors. Make sure you put the date at the top. If you can write on the other side:

These aren't just five snowmen As anyone can see. I made them with my hand Which is a part of me. Now each year when you trim the tree You'll look back and recall When my hand was just this small!


Scrabble name ornaments:


Don't you hate when you have a game with missing pieces? Here we have a simple ornament made with left over scrabble pieces.


It's as simple as finding the letters you need (or just turning them over and writing the letters yourself) and hot gluing the pieces onto each other. Adding a bow for the top and a loop to hang it on the tree. It makes a great gift for school friends.


The Christmas tree hand


Trace your childs hand in green and cut out 10 of them. Make a square in brown for the trunk in brown and a yellow star.

turning the fingers downward on the paper glue four on the bottom row, three, then two and one for the top. Using stampers take the childs finger and have them stamp their fingers onto the tree leaves for ornaments.


The Reindeer cupcake


make cupcakes according to package, ice with chocolate frosting. Use M&M's for the eyes and broken pretzels for antlers.

Saint Lucia Craft

I have been a huge fan of the American Girl Series since I was 10.  One of my favorite girls was Kirsten. Kirsten is a Swedish immigrant who moves to America in 1854. In one of the books (Kirsten's Surprise American Girl Store) we learn about the Swedish  tradition, Saint Lucia. On December 13th the oldest daughter in the household dresses as Saint Lucia and brings Lucia rolls and a warm drink (traditionally hot cocoa or coffee) to her parents in bed. 


Below are the sewing instructions to make your very own gown out of a large bed sheet, a paper Lucia crown. My sister was wonderful enough to make both my daughters the gowns this year using the instructions below.


Here is a copy of the crown (my daughters needed 2 1/2 printed for their heads.)


Here is another Lucia crown where you color, cut out and add a head band(preferably green strip of paper ) a Tomte (a Swedish Elf) and a game to play


This year my daughters school is talking about Holidays involving lights, and Saint Lucia is one of them. I have made Saint Lucia rolls every year since I read the book and so I offered to come into the class and talk about the Holiday. I am bringing in sample sizes of the rolls (the recipe is available below)

Saint Lucia Buns


 Ingredients for 6 buns:
 1/3 cup milk
1/4 cup butter
1/4 cup lukewarm water
1 package (1 1/4 teaspoons) dry active yeast
 1/4 cup sugar
1 egg
1/2 teaspoon of salt
1/4 teaspoon saffron ( a spice you can find at World Market, Trader Joes and Whole foods)
2 3/4 cup of Flour
1 tablespoon cooking oil
1 more egg (used later)
1 tablespoon water (used later)
24 raisins

1) Warm the milk in a sauce pan over low heat. Cut the butter into small pieces and stir. When it's thoroughly mixed turn the heat off and set it aside.

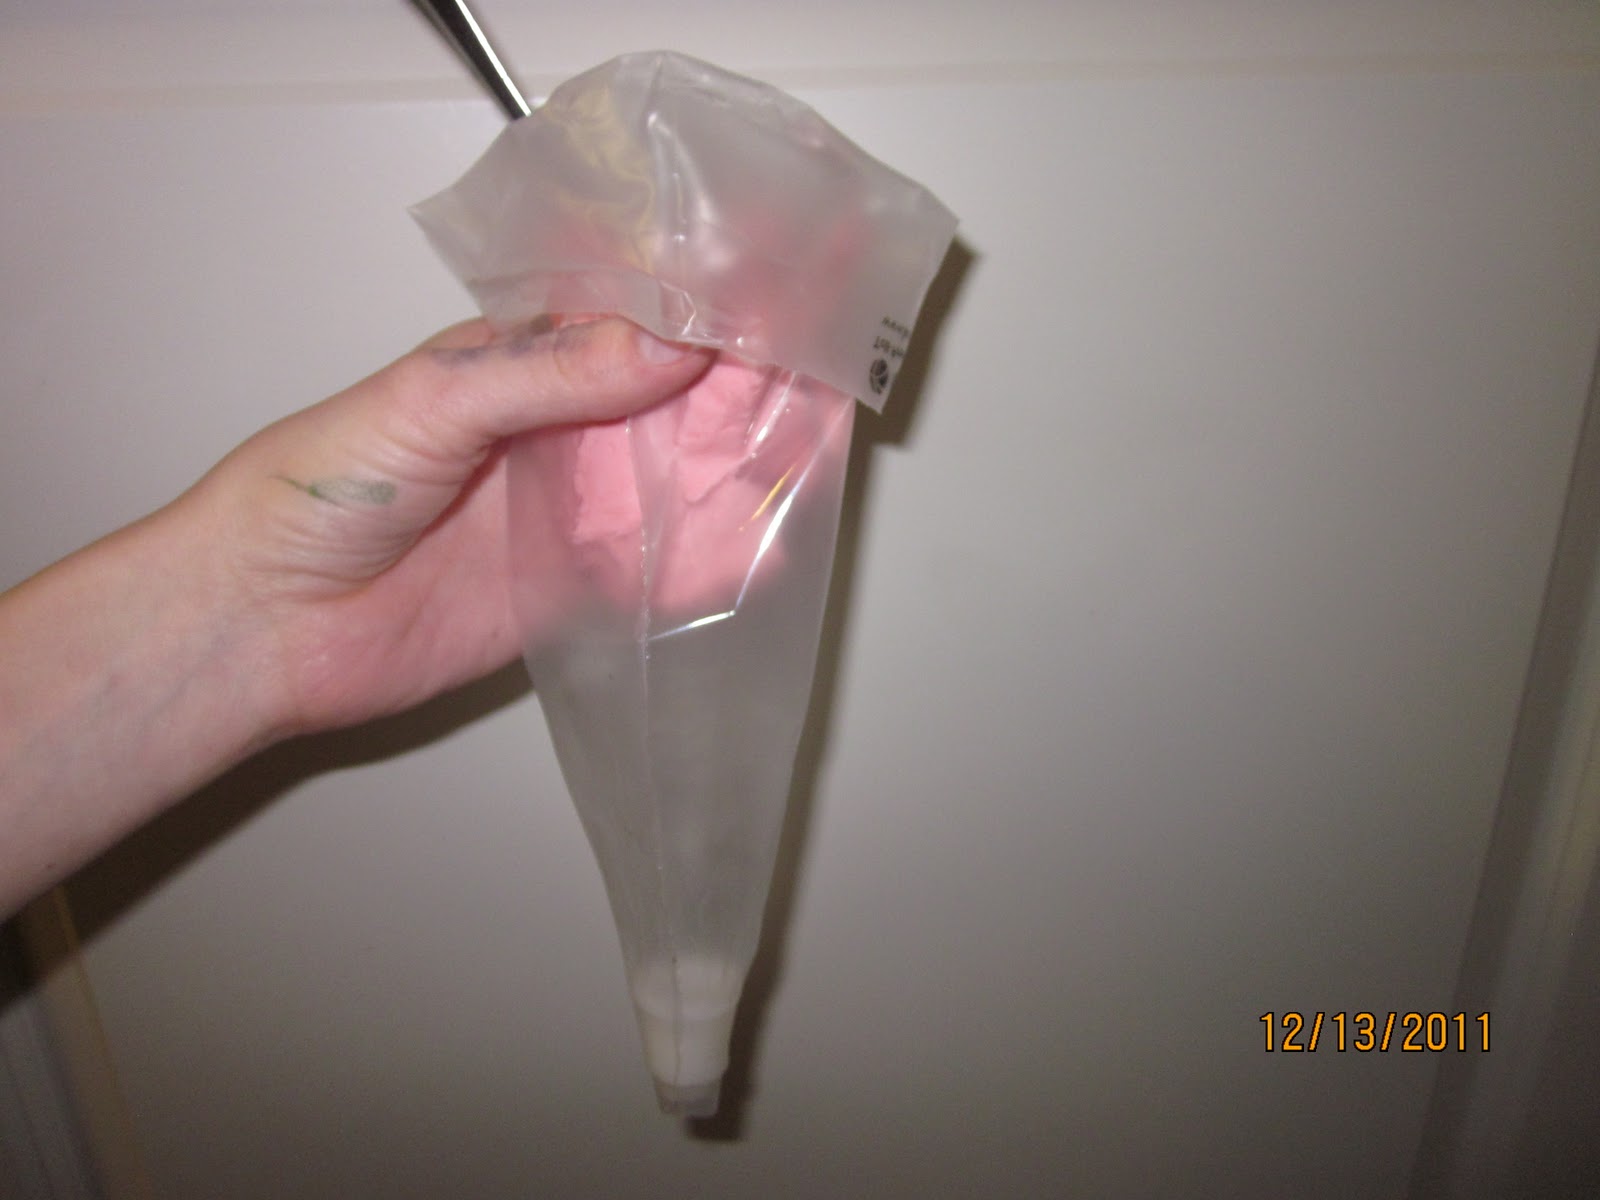
2) Measure lukewarm water (around 115- 120 degrees) and sprinkle yeast in. Stir it well and set aside for 5 minutes until it looks like this:
Notice the foamy look between the "1/3 and 1/2 mark" (please note I doubled the recipe while making this to make more buns)

3) add milk and melted butter to the yeast. Stir in sugar, egg, salt and saffron. Add 1 1/2 cups of the flour and stir until smooth.

4) Add enough of the remainig floud so that you can shape the dough into a ball. Save some of the flour for kneading the dough later.

5) After 5 to 10 minutes of kneading the dough you should have a smooth ball, like this:


6) I usually have to pre-heat my oven to the lowest temperature (somewhere around 170)  to have my dough rise properly.  Place the dough ball into a greased bowl, covering the top. You can also try to have it rise in a warm area for 45 minutes to an hour. (if you put it in the oven, make sure to turn the oven off before placing it in and to leave a crack to let some air escape or you will be baking your bread!)
 BEFORE:


AFTER


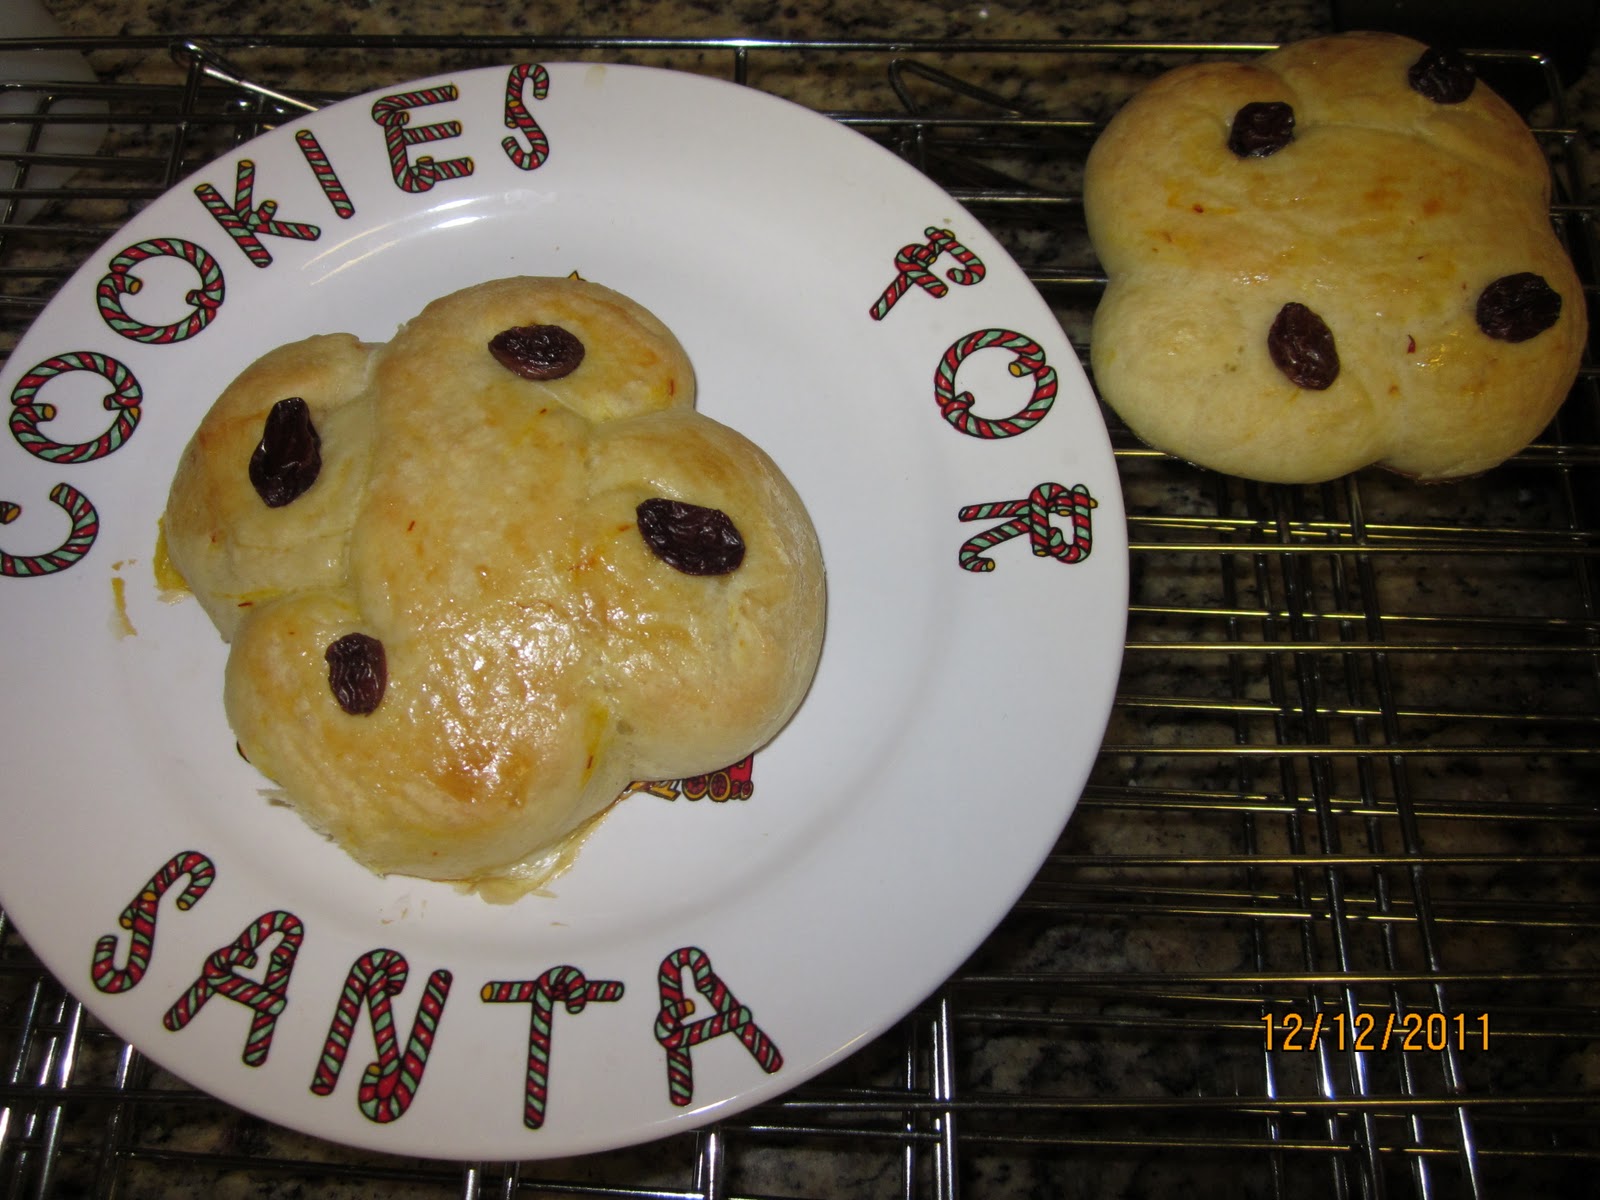
7) Punch the dough down and divide it into 6 sections.  take one of the smaller 6 balls and divide that into two ropes.  Make an X with the dough and circle them inward (like shown)


8) place the buns 2 inches apart on greased cookie sheet, cover with the towel again and let the buns rise for 30-45 minutes.
AFTER


9) When they have risen again  pre-heat the oven to 350 degress. Mix the extra egg and water with a fork lightly and brush over the tops of the buns. Decorate with a raisin.

10) Bake for 15-20 minutes or until golden brown.


A Simple story of Saint Lucia
Saint Lucia lived far away in southern Italy in the third century AD. After seeing her mother miraculously heeled. Lucia said she would not ever get married and instead give all of the money she had to the church and help the poor. Lucia would go out on the coldest night of the year (December 13th) in Sweden and bringing sweet buns and hot drinks to the people who were starving.  It is said she had a wreath with candles on her head so that she could carry the tray of food. After Lucia died in 303 AD she was declared a Saint for all of her work.
Now a day in the early morning of December 13th the oldest daughter in the family gets to dress up as Saint Lucia. She wears a long white robe (that symbolizes purity/saintliness), a red sash (symbolizes her death), and a wreath of lingonberry leaves in her hair. Candles (now battery operated) are set in the wreath to symbolized banishing the dark. She brings her parents a Lucia Bun and a hot drink in bed; we do this to remind ourselves to be good like Lucia.


Today most cities in Sweden appoint a Lucia every year. Schools elect a Lucia and her maids among the students.  They have a big parade and visit shopping malls, old people's homes and churches, singing and handing out gingerbread.
Nowadays boys take part in the procession as well, playing different roles associated with Christmas. Some may be dressed in the same kind of white robe, but with a cone-shaped hat decorated with golden stars, called star boys.