Friday, January 27, 2012

Grandpa Minicks Famous Sticky Buns

When I was little, my grandpa would bake these, just because. Then he would drive over to our house and neighbors houses, just to share these delicious treats. I'm going to write the recipe exactly as I have it from him. I love you a bushel and a peck Grandpa! Miss you :(

STICKY BUNS
Use the basic sweet-dough recipe given here, which makes 3 dozen rolls. Or use your own favorite recipe.


Basic  Sweet Dough 
1&1/2 cups milk
1 cup sugar
3 teaspoons salt
1 stick of margarine
1&1/2 cups warm water (100-115 degrees)
3 packages of  yeast
4 eggs
9&1/2 to 10 cups of flour


1.Measure water and pour into a bowl. Stir in yeast. Add 1 teaspoon of sugar to activate the yeast.
2.Add margarine to milk. heat milk and margarine in microwave for about 2 minutes.


3.Add sugar and salt to margerine-milk mixture. Add cold beaten eggs. The cold eggs help to cool the milk-margerine mixture.
4.Add yeast. Turn on mixer for a few seconds
5.Add half the flour and mix for 2 minutes.


6. Add remaining flour and mix for about 5 minutes. Dough will be very sticky.


7. Leave dough in bowl, cover with a paper towel and place in a warm draft-free place. The oven is perfect. Turn the oven on to warm for about 2 minutes, turn it off, and place the bowl of dough inside. After one hour, remove the bowl from the oven. Dough will have doubled or nearly doubled in bulk.


Before:


After


Ccarmel Topping
1. While the dough is rising, combine 2 cups of light brown sugar, 1 stick of margerine, and 1/2 cup of light corn syrup. Place on burner and boil for 1 minute.
2. Pour hot caramel mixture into three 9 by 13-inch pans, approximately 1/3 into each pan. Allow to cool and sprinkle with nuts (Pecans, or walnuts, or whatever).


Forming the rolls
1.After the dough has doubled in bulk, punch down, and divide into 3 parts.
2. Either flour your table top or grease it with shortening.


3. Roll out one of the three portions of dough into a 10 by 12-inch rectangle (approximately).


4. Coat the top surface of the rectagle dough with margerine or shortening. Sprinkle 1/3 cup sugar over the surface. Sprinkle cinnamon over the sugar.


5. Roll up the dough like a jelly roll.


6. Cut the roll into 12 pieces. Start by cutting the roll in half, then cut each half into halves. Finally, cut each of the 4 pieces into thirds.


7. Place the pieces on the caramel mixture, with the outside ends of each piece touching a neighboring piece. This keeps the individual pieces from unrolling as they begin to rise.

8. Allow the rolls to rise for about an hour or more. Again, the oven is a good place. Usually the dough swells until the entire surface of the pan is covered.

9.Bake for 25 to 30 minutes at 350.
10. Remove from oven and cool for 1 minute.
11. Place a sheet of aluminum foil (slightly larger than the pan) over a piece of cardboard or section of newspaper. Invert the pan of hot rolls over the foil and the rolls will be released from the pan. Remove any remaining caramel topping and nuts from the pan and spread onto the rolls.
12. Enjoy the rolls.


***


Cream Cheese Frosting.


Since my daughters can not have sticky things, I made my Grandpa Minick Sticky Buns with a Cream cheese frosting.


1 package or cream cheese
1/4 cup of butter
1 & 1/2 cup powder sugar
1 teaspoon Vanilla.


Mix together in mixer. When it's fully blended, wait 5 minutes before icing.


Thursday, January 26, 2012

Saint Patricks Days Crafts

What you'll need:
four leaf clover template
Leprechaun template ( I can't find my original one and this one is less scary looking;)  )
Green Ribbon
Black, Red, Yellow, Orange, Green, Blue and Purple construction paper

Four Leaf clovers:
First I printed the four leaf clover template and cut it out. Next I traced more copies onto green paper and cut them out. My daughters and I hung them up all over the house and used the green ribbon to hang them from the ceiling to make a fancy chandelier.


Lucky the Leprechaun, rainbow and pot of gold.
Every year we put up our rainbow and leprechaun. On the morning of Saint Patrick's day they are always surprised to see  chocolate coins at the end of our rainbow!
I cut out 2 pieces at a  time, shaping them into a rainbow. (see picture above).... which is probably the worst explanation...but I made this stuff three years ago.

Leprechauns & pot of gold toilet paper rolls

What you'll need:
Two and a half rolls of toilet paper
Green paint
Brown paint (or you could use yarn)
Skin color paint
Black paint
Black sharpie
Yellow and Green Felt

First paint the 3/4's of the tube green. The top half will be skin color. (Except the man, whose top will be green for the hat!) Let it dry. Next add on the brown hair or yarn & beard for the man. Let dry. take your half tube and paint it black.

For The gold I drew little circles on yellow felt and cut them out.
For woman: I drew small shamrocks and cut and glued them to her head.
For Hat: I traced the outline of the tube and then made a bigger circle around it. Then I cut the center out & slid it down the roll when it was dry.
With a Sharpie I added eyes and the details of the clothes.


Here are my St. Pattys cupcakes.


Mix the box according to the package. divide evenly into smaller bowls and add food coloring. Line cupcake pans and pour thin layer of each color into the pans.  Bake according to package.
I then iced the cupcakes and drew shamrocks onto the tops


Here are other Saint Patricks day crafts.


DLTK's St. Patricks Day crafts

Sunday, January 15, 2012

Kindle Fire Case pattern/ Ipad/tablet case

My husband just got a Kindle Fire and we wanted a case for it to keep it safe during travel. After searching I found several I liked, but hated the price. So I decided to come up with my own.


What you'll need:
*An old book you don't want that is the same size as your Kindle/IPad, etc...
*Two pieces of felt
*Hot glue gun & sticks
*2 sets of Fabric (mine are from the small bundle packs you buy at Wal*Mart)
*Elastic
*Cardboard (From goldfish or cheeze-its)
*Needle & Thread

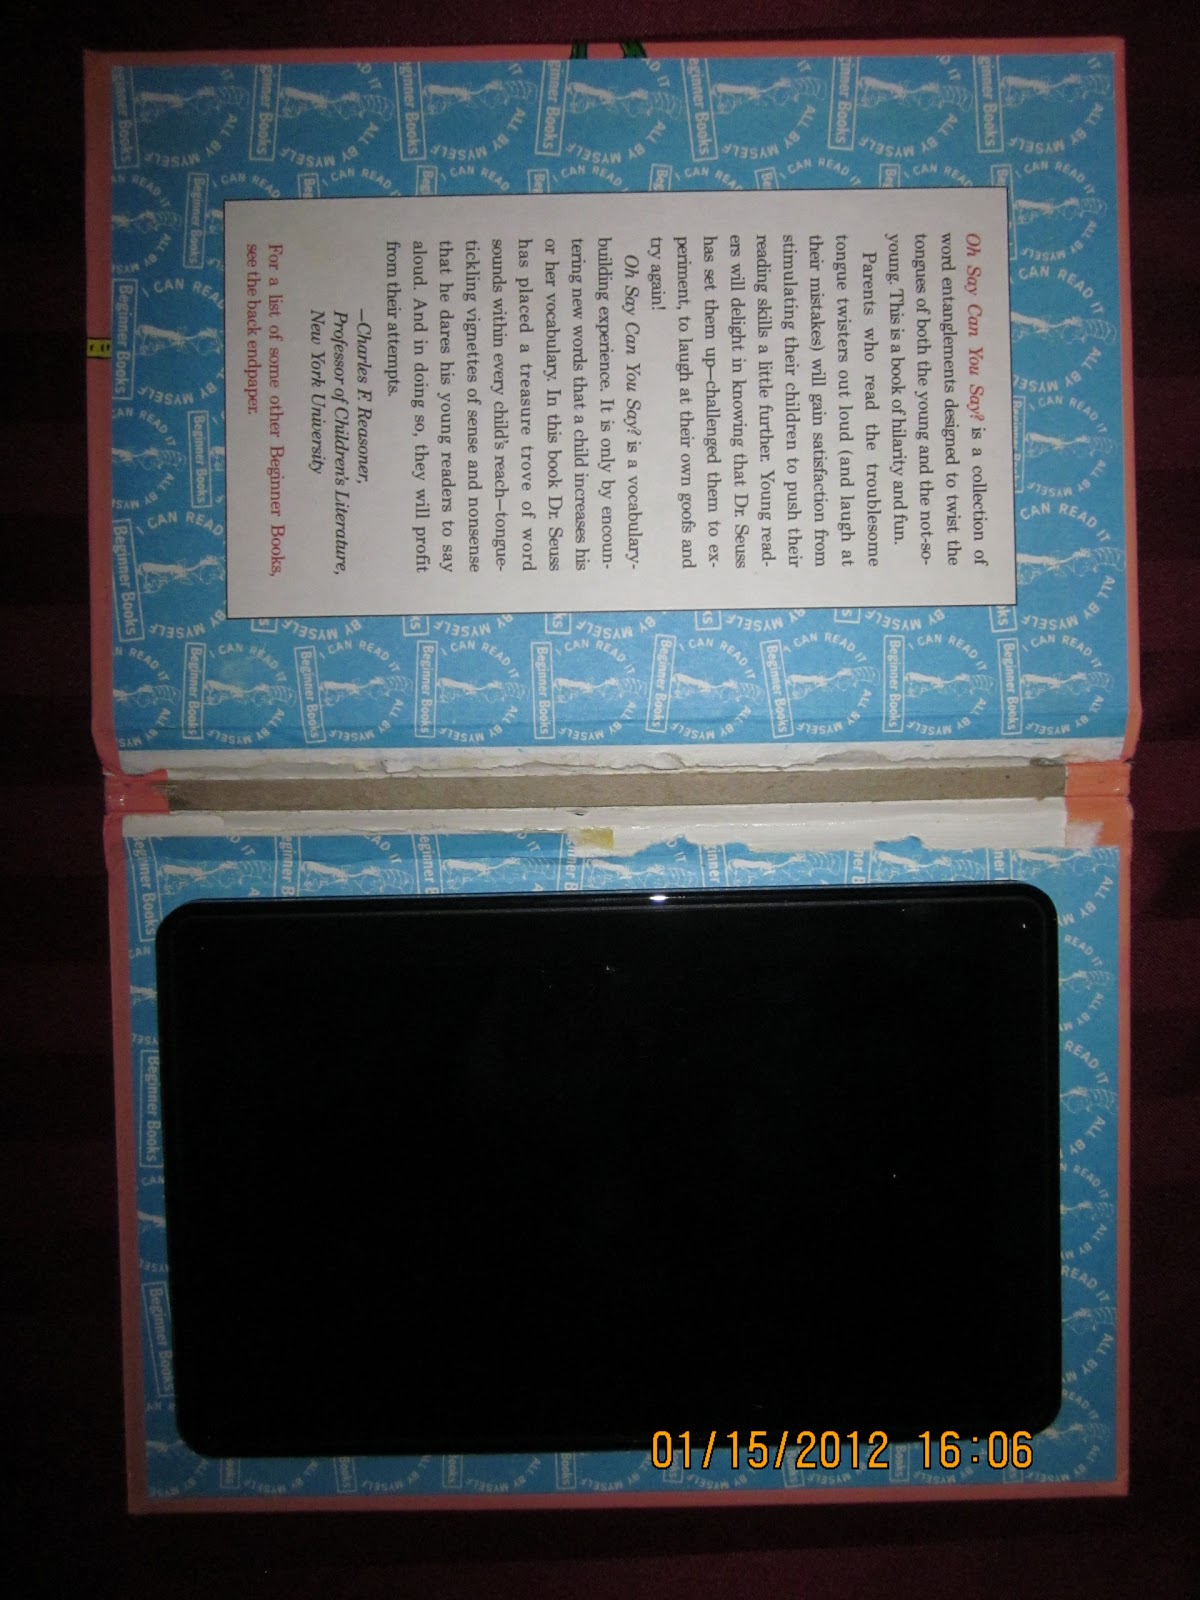
First, my husband pulled the paper out of a book (Sorry, Dr. Suess)


Remove your tablet & hot glue the pieces of felt on both sides of the book.


Place felt covered book on fabric


 Hot glue the remaining fabric to the book.

With your bunny Graham or goldfish box, cut it down to fit the inside of your book..

Cut a piece of fabric that same size & glue it to the left corner (make sure it covers the bend in the book). Save the cardboard for later.


Cut a piece of elastic the height of your book. pin it to the inside of the folded part of the book (look where my pin is)
Hand stitch it into place


 Remember that piece of cardboard? Well, you need it now. You'll need to cover the piece of cardboard in fabric just like you did the book (excluding the felt). Not Shown

Then take four pieces of elastic and sew the elastic onto the four corners of the cardboard back (into the fabric, not the board) Not Shown

Your last step will be to hot glue the fabric covered cardboard piece into place.

 Opened:

Closed


Using this same idea you can make a photo album with a 3 ring binder.


Tuesday, January 10, 2012

Valentines day treat and crafts

 Simple Valentines Craft and treats

Wreath


 You'll need


a paper plate
foam hearts (or paper hearts)

Cut the center out of the paper plate and glue  or press the hearts onto the rim. That simple


Valentines Day Strip


What you'll need:
a strip of red construction paper
 pink hearts


Write whatever you want inside the hearts (things like, "Be Mine" or "Happy Valentines Day") cut them out and glue them to the strip of red.


Here is an idea for inexpensive Valentines day goodies to make for your family, school friends or co-workers.


What you'll need:
6 cups of Rice Krispie cereal
4 cups of marshmallows
2 tablespoons of butter
lolipop sticks (found at Wal*Mart and local craft stores)
Candy melts (also found at Wal*Mart and local craft stores)
Sprinkles
Parchment paper
Cookie cutter
Extra butter for your hands...yes I'm serious.

First add the butter into a big pot on low heat. Add marshmallows and slowly sir

until completely melted (I found this makes it easier to add the cereal in later) See? no lumps... okay maybe a couple...


 Pour in cereal


 mix it up

While its setting, place a piece of parchment paper on a tray and butter your cookie cutter


Next butter your hands and take a chunk of the cereal and pack it together, and push it into the cookie cutter.


 Next add the sticks


 Take your chosen color of candy melts and put them into a zip loc.  Pop them into the microwave for a minute or until done.


Snip the corner edge. It's now your make-shift icing bag (and cheaper too). Add to lolipops


Sprinkles are optional


Wrap in cellophane paper or those treat bags found by the candy melts and lolipop sticks


For more crafts visit:

Thursday, January 5, 2012

Cupcakes

Here are some of my cupcakes.

The Barnyard cupcakes

I made over 70 cupcakes for my daughters kindergarten classes and staff.
 Most of the faces are just made with M&M's. The sheep are made with mini marshmallows cut in half and M&M's for the eyes. the pigs ears are rolled down twizzlers and mini chocolate chips for his nose. The cows eyes are mini marshmallows with mini chocolate chips in them. For full directions, visit Betty Crockers website: here 

Here are my St. Pattys cupcakes.


Mix the box according to the package. divide evenly into smaller bowls and add food coloring. Line cupcake pans and pour thin layer of each color into the pans.  Bake according to package.
I then iced the cupcakes and drew shamrocks onto the tops


Cookie Monster cupcakes


I used blue gel dye and tip 233 ( flat top with a bunch of holes) and just squeezed it onto there. The eyes are white icing piped into a circle and mini chocolate chips. You can also just buy the blue wax looking sprinkles ( it'll cost more) or for the eyes you use mini marshmellows cut and then out the mini chocolate chips in

Other cakes/frosting

Over the last four years I've made tones of different cakes. Some were amazing; others- not so much. I've gotten better over the years. The one thing I can tell you if that you really should use butter cream icing (recipe here:) if doesn't get that "wet" look after it's set out for a day, like store brand.

The first one I made after working in a bakery was this one. I didn't make the icing

Dora The Explorer cake (Wilton pan) 2006.


Tinkerbell in August 2008. I bought the kit separately before I left the bakery.


Wall-e. Wilton cake pan.  November 2008

(My Husband and Daughter share a Birthday :)   )


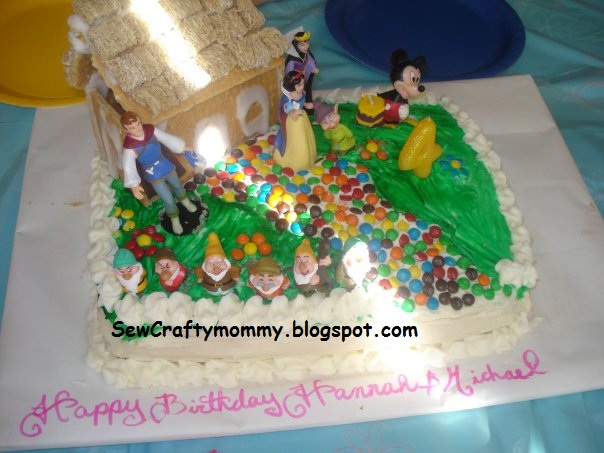
Snow White cake. Made with store bought icing. 2009


My husband and daughter share a birthday


I made the house out of graham crackers and frosted mini wheat. However this was the year I learned to make the cakes the day BEFORE the party. Two reasons: It's less stressful, and two you can take your time.

My 5th wedding Anniversary


Disney Princess- 2010


Daisy Scout Cake. 2011 This one is made with store bought icing


The Lady bug cake. 2011 I used a Wilton cake pan for this ( I hate using the star tip like they show you, so I always smooth it out)
Store bought icing


Lemon Meringue. 2011  I had a little trouble with her face- it's always the hardest thing for me to draw (and even harder with icing!). This one is made with Butter cream icing


Here are my other cakes using fondant and carving:

Fondant and carved cakes

I have only used fondant this one time. It was very frustrating and I'm glad my best friend was there to help me finish these two cakes. I have the fondant cutters for the stars and hearts on my daughters cake.  To make the Mickey it is actually 3 circles carved down.


To carve a cake I recommend making it 2 days before the party. You need to freeze the cake completely before carving into it. This is the same thing they do in grocery stores. They also decorate the butter cream cakes the day before your order anyway (unless you chose whip cream icing--yum!).

My sisters baby shower cake- March 2012. Learn how I made it here


Epic Mickey (made in 2010) based on the Disney game.


For my daughter:


side view:


Carved Dress cake for my friends birthday. 2011

Using this pattern from the book I own, I made this cake for one of my best friends birthday.